
Outlook 2016/Office 365 Email Account Setup
Want to setup your email in Outlook? Using Windows Mail?
Click here for Outlook 2007 setup guide
Click here for Windows 10 Email setup guide
Click Here for iPhone and iPad Email setup guide
This procedure can also be used to configure email on your mobile phone.
Use the "Manually Configure" option on your phone's email setup procedure, and
skip to Step 4 below.
Step 1. Open Outlook, click on the File tab, click Account Settings

Step 1a. If you see this screen, choose Manage Profiles.
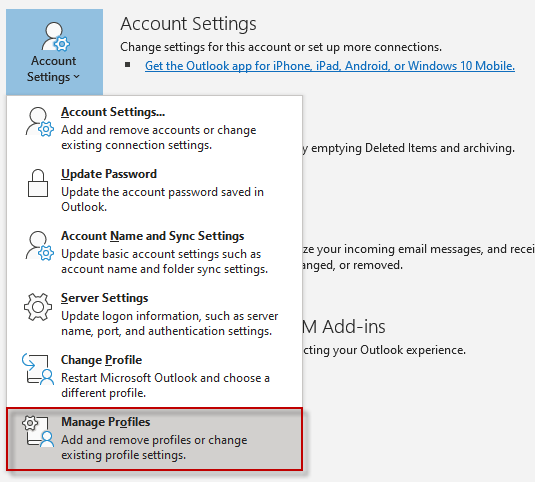
Otherwise, click Account Settings from the dropdown list:

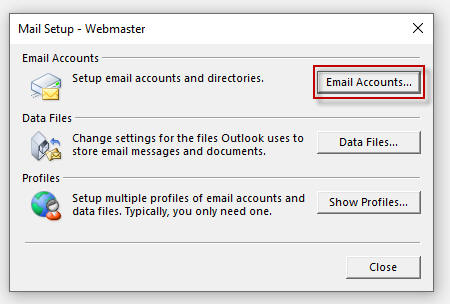
Step 2.
If troubleshooting or re-configuring the account, click the 'Email Accounts' button, and
skip to Step 4 below.
Server Retention settings may be found here, under Step 6.
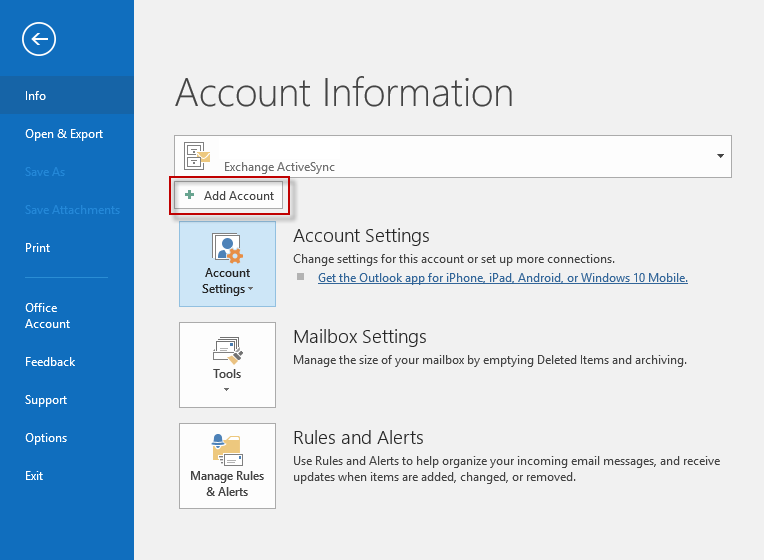
Step 2b. If adding a new account, click "Add Account":
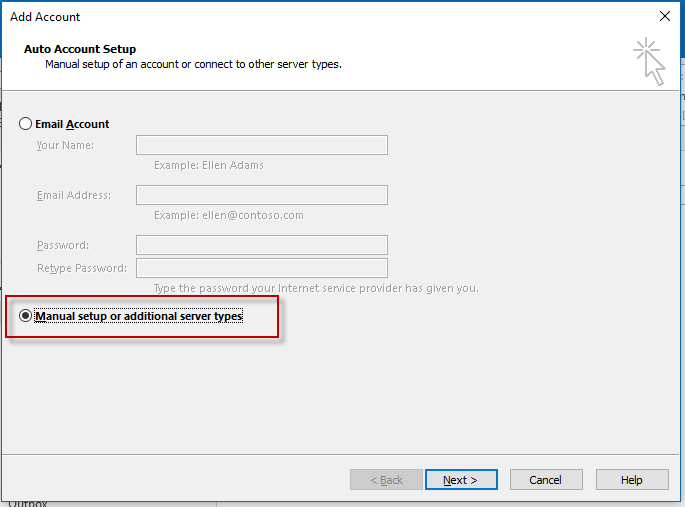
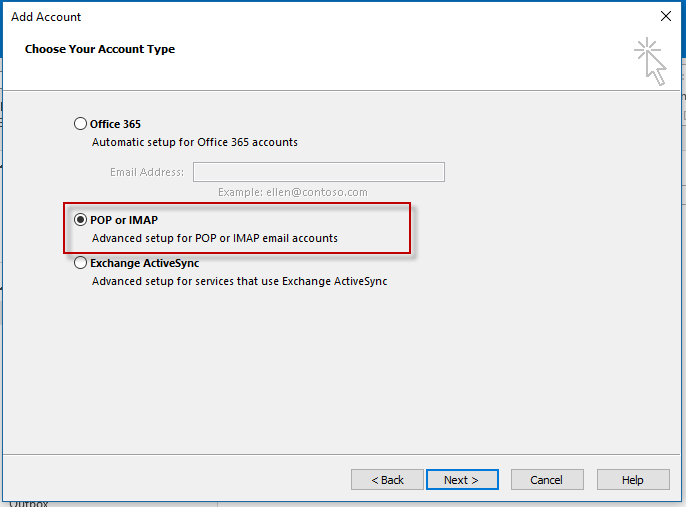
Step 2c. Choose "Manual Setup:
Step 3. Choose "POP", and click Next.
Configuring the Mailbox:
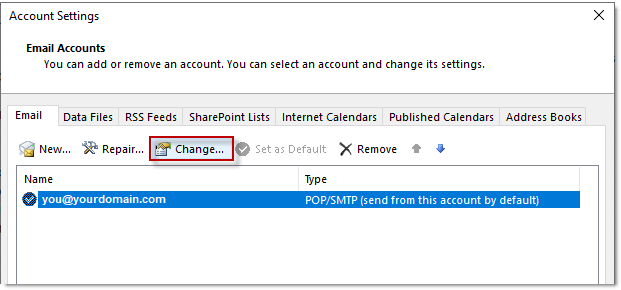
If you are reconfiguring a mailbox, you will see the screen below. Highlight the account
you wish to change, and click 'Change'.
If you are adding a new account, scroll down to Step 4, and fill out the screen as shown.
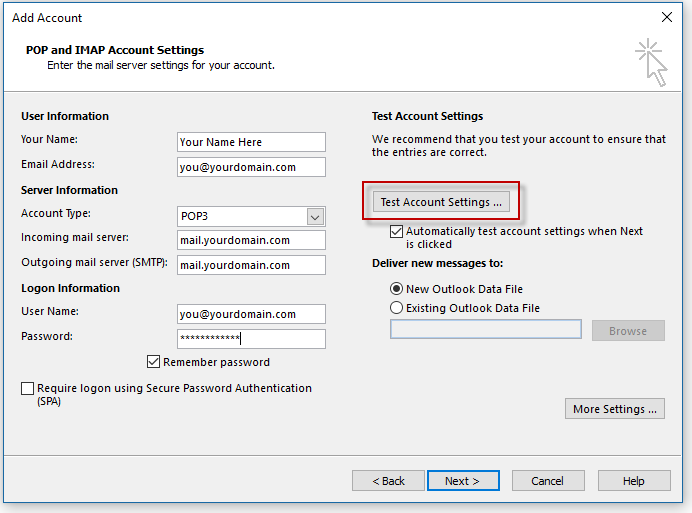
Step 4. Fill in the form as shown below, using your email information:
In the Your Name box, type your full name, like 'Bob Jones'
In the Email Address box, type your full email address.
Make sure you choose POP3 as the Account Type:Email Address: you@yourdomain.com
User name: you@yourdomain.com
Password: **********
Incoming (POP3) Server: mail.yourdomain.com
Outgoing (SMTP) Server: mail.yourdomain.comDo NOT use SPA, SSL, or any sort of encryption:
Require logon using Secure Password Authentication (SPA)?: Unchecked
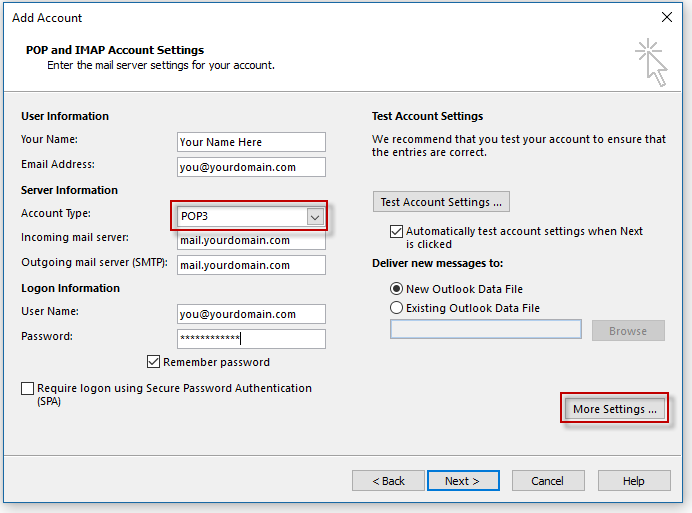
Step 5. Click the "More Settings" button, to set the server configuration.
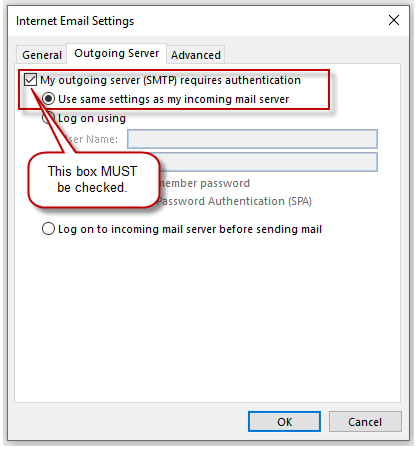
Click the Outgoing Server tab, and check the boxes as shown below:
My outgoing server (SMTP) requires authentication: Checked
Use the same settings as my incoming mail server? Checked
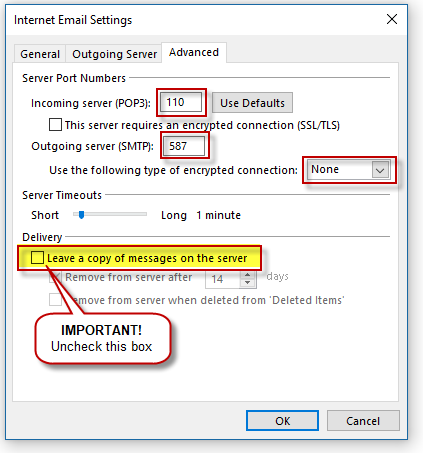
Step 6. Click the "Advanced" tab, and ensure that the Incoming and outgoing
port numbers
are set
as shown below, and that the "Leave a copy of messages on the server" box is
left unchecked.
If this box is checked, then your server inbox will fill up over time, and you
will stop receiving
mail
when you exceed your server inbox capacity limit of 50MB.
Incoming server port (POP3): 110
Outgoing Server port (SMTP): 587
Use encrypted connection: None
Leave a copy of messages on the server: Unchecked
If you want to leave a two week 'rolling window' of messages on the server
that you can access with your cell phone,
configure this screen as follows, making sure to check the box 'Remove from
server after 14 days'.
Otherwise, your mailbox on the server will fill up after a period of time.
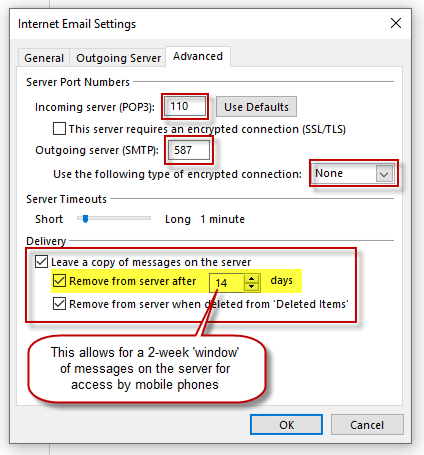
Click OK when done.
Step 7. Once back to the "Add Account" screen, click the "Test Account Settings"
button,
to verify your setup is complete, and then
click Next.
Testing Account Settings:
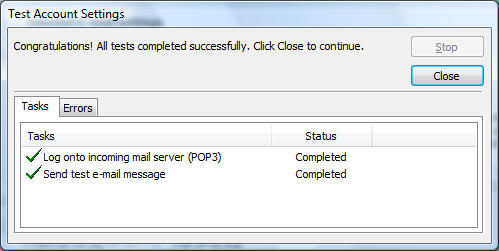
Your setup is complete.
Step 8: If you need to get back to the configuration screens, go to the File tab, click
Account Settings>Account Settings>Manage Profiles, and that will take you to Step 4:
If you are setting up a mobile phone, use the same settings as shown
above,
and make
sure you configure it so the messages you delete from the phone are also deleted from the server.
You will need to manually configure
the mail account
info on your phone, as the automatic
setup wizards on most mobile phones will
not work.
Have a different version of Email? Using Windows Outlook?
Click here for Outlook 2007 setup guide
Click here for Windows 10 Email setup guide
Click Here for iPhone and iPad Email setup guide
Need more assistance? Contact Us or call 253-380-4100.