
iPhone Email Account Setup
Want to setup your email in Outlook? Using Windows Mail?
Click here for Outlook 2007 setup guide
Click here for Outlook 2016 setup guide
Click here for Windows 10 Email setup guide
This procedure is used to configure email on your iPhone or iPad.
Use the "Manually Configure" option on your phone's email setup procedure, if available.
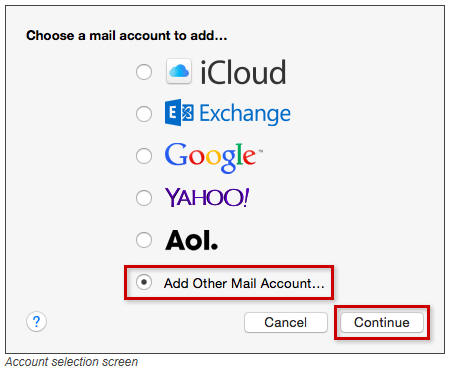
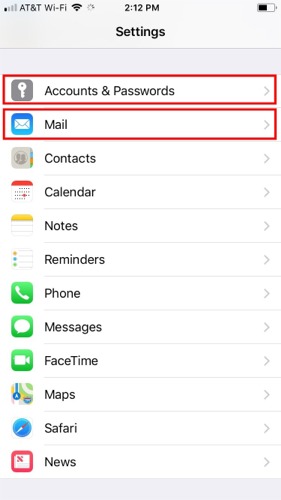
Step 1. To configure a new mailbox, open the Settings screen, click Mail, and Add New Account.
If you are troubleshooting an existing mailbox, click here for instructions.
Choose 'Add Other Mail Account...', and click Continue:
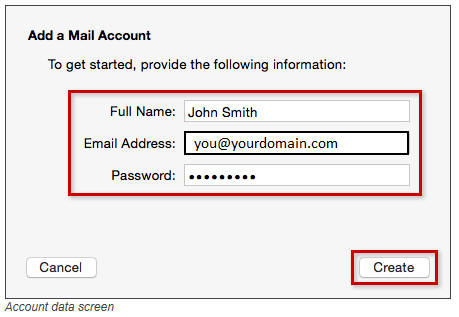
Step 2. Next, enter your name, email address and password.
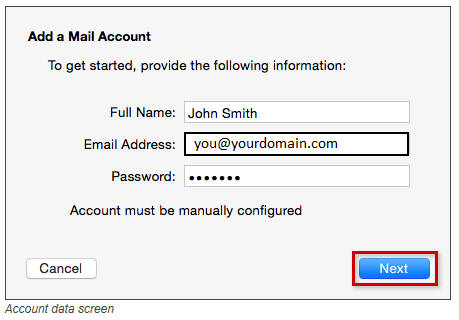
Step 3. In most cases, the iPhone cannot determine the email settings automatically, so
choose the 'manual configuration' option, or click 'Continue' when the system cannot
find your mail server.
After receiving a message that the Account must be manually configured click the Next button.
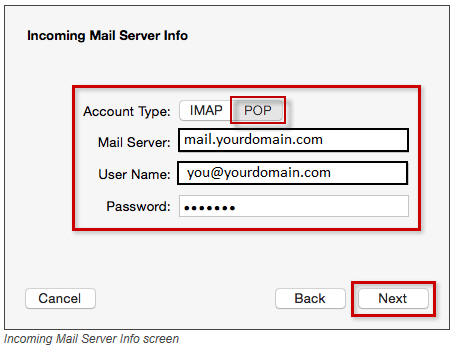
Step 4. Choose POP instead of IMAP, and fill in the fields as follows:
| Parameter | Value |
| Account Type | POP |
| Mail Server | mail.yourdomain.com |
| User Name | you@yourdomain.com |
| Password | Your password |
Step 5. After receiving the notice that Additional account information required, click the Next button.
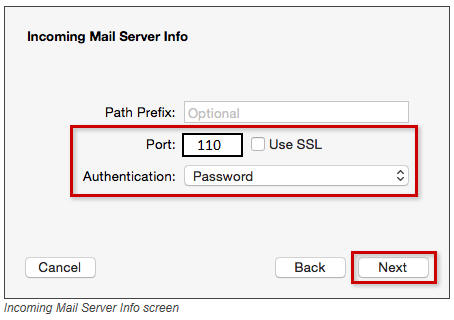
Step 6. Supply the additional Incoming Mail Server Info using the table below as a guide. Click the Next button when finished.
| Parameter | Value |
| Port | 110 |
| Use SSL | Un Checked |
| Authentication | Password |
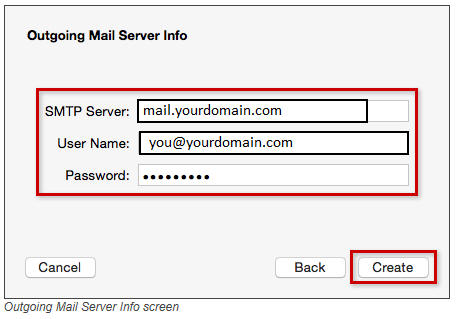
Step 7. Configure the Outgoing Mail Server as follows. Click the Create button when finished.
| Parameter | Value |
| Account Type | POP |
| Mail Server | mail.yourdomain.com |
| User Name | you@yourdomain.com |
| Password | Your password |
Step 8. After receiving the notice that Additional account information required, click the Next button.
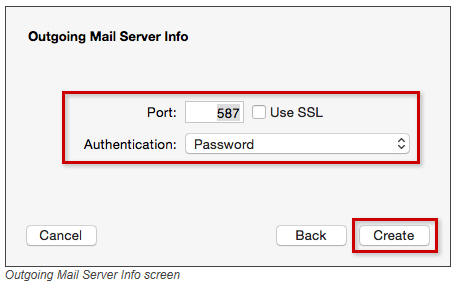
Step 9. Supply the additional Outgoing Mail Server Info using the table below as a guide. Click the Next button when finished.
| Parameter | Value |
| Port | 587 |
| Use SSL | Un Checked |
| Authentication | Password |
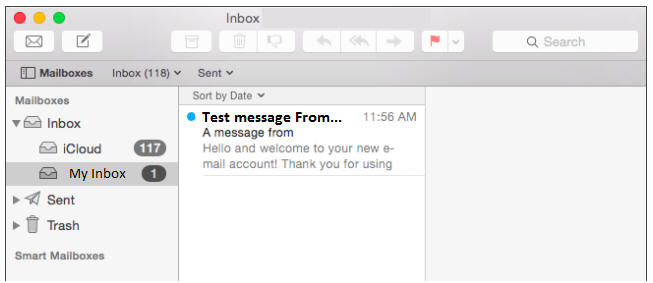
Step 10. Mail will connect to your account and begin downloading your mail to your inbox.
This screen is from an iPad, your iPhone screen may look different.
If you are having trouble receiving your mail, see the troubleshooting section below, to
confirm your settings are correct.
Step 11. Prevent your server mailbox from filling up.
If you ONLY use your iPhone to send & receive mail on this account
(not your desktop computer), then you need to configure your iPhone
to delete messages after they are downloaded to your phone. To
do this, follow these steps after completing steps 1 - 10 above:
Here's a quick overview of how to do this:
- On the iPhone, open the Settings screen.
- Find Mail > Accounts (or Passwords & Accounts, etc.) and open that screen.
- Click on your Dragonwyck hosted email account.
- Click on Advanced at the bottom of that screen.
- Look for "Delete from server"
- Select the "Remove after Seven Days" option.
- At the top of the screen, click Advanced.
- On that screen, click Accounts
- On that screen, click Done

Settings & Troubleshooting
The settings below will guide you in getting the mail account set up once it has been unsuccessfully created using the setup wizard.
Step 1. If you are modifying your account settings, click Accounts & Passwords.
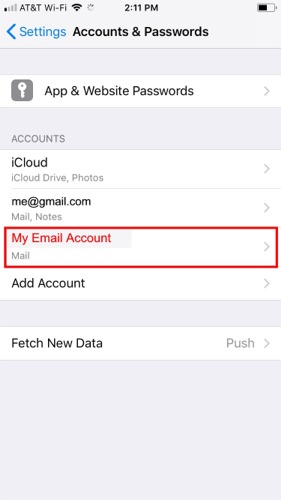
Step 2. Once in Accounts & Passwords, find your email account on the list, and click on it:
Step 3. This will open the Account Screen.
Here you can see your account name, emails address, and incoming server name.
Your Host Name is mail.yourdomain.com
(substituting your own domain name here)
Your User Name is your entire email address, like you@yourdomain.com
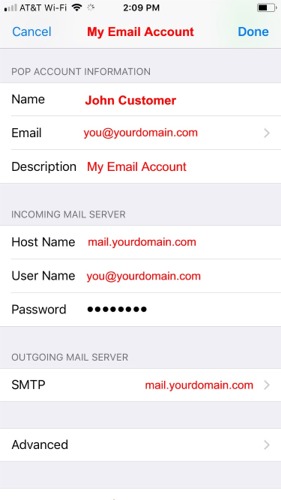
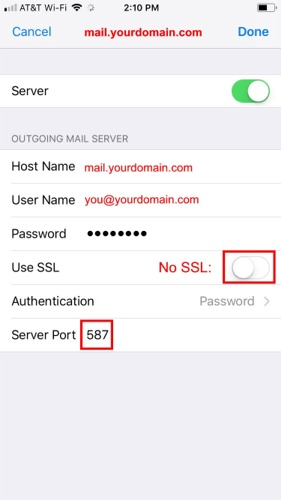
Step 4. If you click on the SMTP button, you will see the following screen:
Again, your Host Name is mail.yourdomain.com
(substituting your own domain name here)
Your User Name is your entire email address, like you@yourdomain.com
Turn off SSL, and set the Outgoing Server Port to: 587
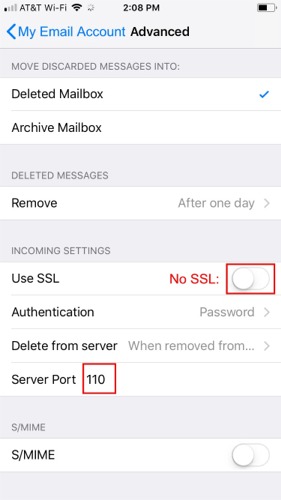
Step 5. Clicking the Advanced button takes you to the Incoming Server page.
Turn off SSL, and set the Incoming Server Port to: 110
Set 'Delete from server' to: 'When removed from inbox':
Step 6. Click Done, and back out of the previous screens, saving as you go.
Test your email by sending a new message to yourself, and see if it comes back.
Step 7. Prevent Server Mailbox from filling up:
As noted above in step 6, if you only use your iPhone to check mail (and don't
use a desktop computer),
you can configure your phone to delete
emails from the server after 7 days.
- Look for "Delete from server"
- Select the "Remove after Seven Days" option.
- At the top of the screen, click Advanced.
- On that screen, click Accounts
- On that screen, click Done

Have a different version of Email? Using Windows Outlook?
Click here for Outlook 2007 setup guide
Click here for Outlook 2016 setup guide
Click here for Windows 10 Email setup guide
Need more assistance? Contact Us or call 253-380-4100.